SWS FTA Jedi Texts
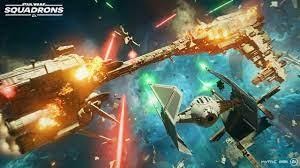
Star Wars Squadrons
Jedi Texts
For the benefit of TRA members, with special thanks to:
TRA's Jedi Elite
Remnant Squadron
Spicy Squadron
Main Contents
Tasks:
- Task 1 – Know your ship!
- Task 2 – Take down the corvette.
- Task 3 – Power Management.
- Task 4 – AI dogfight
- Task 5 – Set Targeting
- Task 6 – Power Shunting
- Task 7 – Torpedo Throwing
- Task 8 – Missile Dunking
- Task 9A – Rebel Raider Race
- Task 9B – Imperial Corvette Race
- Task 10A – Rebel Frigate Run
- Task 10B – Imperial Frigate Run
- Task 11A – Rebel Star Destroyer Run
- Task 11B – Imperial MC75 Run
- Final Test Rules
Twigs ship guide
Yes I’m naming this. Why? Because it’s based on my views and experience. Ship selection is personal and will depend on game type and what your current objective is. This is a general guide and recommendation to the ships as I see them. I am primarily a dogfighter so that may influence my views. The ‘Meta’ is always changing so things can go out of date pretty quickly!
Fighters
X-Wing
Rebel classes cannot make use of power shunting so instead you rely more on good power management and charging systems while drifting. Remember, if you’re using a system you should not have power in it! The Jet engine is useful here as it will build boost quickly, but it also comes with a higher usage cost. In both Dogfights (DF) and Fleet Battles (FB) the burst lasers have rapid recharge rate and high damage output, although for player vs player engagements it takes some time to get used to correctly tracking and landing shots. Hull and shields can be an individual choice, but for DF I like the ‘heavy’ hull for its increased HP. With the increased use of ion dunking, you will see a lot more people running deflector hull and shields to increase lock on times. DF I’d choose ion missile and repair for my aux slots, while in fleet battles it all depends on your role and phase (opening, defence or attack).
TIE Fighter
Power shunting means burst lasers are a must for me, while engine can be your choice of jet or slam. Personally I’d choose slam as its passive boost charge and the TF’s power shunting means I don’t have to live with the boost penalty that comes with Jet. Again in a dogfight I’d take heavy hull and couple it with an ion missile and repair. Just remember to watch your power and not deplete lasers too much. Like the X Wing, your FB loadout will depend largely on phase and in both FB and dogfight there is again that shift towards deflector hull to delay any missile locks.
Bombers
Y-Wing
Slow in every respect the only reason to take a YWing is its heavy firepower, but without the power shunting of the Tie Bomber it can take a while to get overcharge in that rotary cannon. Use of multi lock missiles and goliaths make this ship good for taking out packs of ai in fleet battles to build morale, but low speed and low boost storage make it vulnerable to attack in any game mode. I’d always take jet engine in this, just to get that rapid boost charge. Anything you can put on to delay missile locks is also highly recommended. If you want to take this in to a dogfight equip the ICT turret, don’t spam it too often and keep close to your team mates for cover. Your other slot should be the goliath, since if a player leaves it too late to chaff it when locked the resulting explosion will take them out. Dumb firing it at terrain close to an enemy can also work well. If you just want to troll, leave power in the rotary and just equip boost extension, slam and ICT.
TIE Bomber
Slow, tanky and thanks to Power Shunting a formidable opponent. Rotary cannon, heavy hull and jet engine mean you can take hits and deal out for worse than you receive. Don’t overdo the shunt though, its poor handling mean you HAVE to drift this thing around, so you need to make sure that boost is there and the jet engines high recharge is great for that. Just don’t overuse it or shunt out too often as silly mistakes can still leave you vulnerable. Like the Ywing, in FB you want multilock and goliath, dogfight you can get away with the same loadout.
Interceptors
A-Wing
Fast, small, nimble and made of glass. Loved by VR players the A Wing is a joy to fly, but its fragility mean you NEVER take a head on engagement. Honestly, this ship is worth playing with loadouts. Some like an engine that gives more speed, others more manoeuvring. Shields and hull I’d say fortified shield as it starts overcharged but others prefer something that recharges quicker. Quite often you’ll see people take the reflec hull as you won’t be seen or targeted until within 1500m, add in the stealth aux and you can close that last 500 before they know you are there and decimate them. On the other hand, dampener has less HP penalty and delays enemy missile lock on. Sometimes you want to be visible but hard to hit. As for lasers, Plasburst is high skill ceiling for PVP, while rapids mean you have to get close. Both of these have higher DPS and recharge than standard. Right now I’m loving rapid fire and rockets, couple it with the jammer for stealth it means I can get in close behind someone and cause a lot of damage very quickly then get out.
TIE Interceptor
This ship has high DPS with standard lasers, take nothing else, unless you are a plasburst king. Take the engine of your choice, while again the dampener hull wins out for me. Engine wise I’d say propulsion or standard, I usually go with standard though the better accel and decel of propulsion can be useful if you make a mistake and find yourself coming toward a rock quickly in Galitan. Like the A Wing you need to get in and out very quickly, so jammer and repair is a wise choice. You could equip rockets or missiles for extra damage but remember that rockets (especially ion) have a different lead time to your lasers.
NOTE:- In no circumstances should you ever take mines in any ship, it is a waste of a slot. They can be shot down or chaffed and if a player hears one deployed they can just get out of the area and force you to come to their location. Much better to use that mine slot with something you can put down on a target or use to repair/bug out.
Support
U-Wing and TIE Reaper
I’ll say it right now, I’m no support flyer. I only take it for a daily challenge completion or to fill a role in Fleet battles. In my opinion (and someone will tell me I’m wrong) this is one of the few ships where in either side you can equip similar loadouts. I’d go with agile hull over reinforced as you are a huge target in these ships so being able to manoeuvre wins out for me. Slam again just for its passive recharge, but some might say Propulsion or microthrust if you run advanced power management as in that case you’ll get no benefit from slam. Weapons you should go with Ion, in either DF or FB you can strip shields or disable players and for FB you play a role in helping beam down shields on raiders and frigates. Mask and mark are great in DF and Fleet battles, while in other phases of fleet battles you may prefer mark and resupply to both help increase your objective players damage output and keep them in the game longer. Just remember to roll back when you’ve deployed your assets, you’re a rear support not front line fighter. Forget turrets, they’re generally banned in competitions and will just get shot down by a well-co-ordinated team. Remember, a support is a priority target in either game mode so you will take fire. Be manoeuvrable and don’t get caught out of position or somewhere your team can’t help.
Others
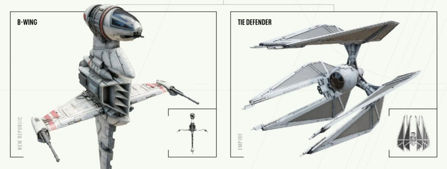
B-Wing
Slow, high damage output…it’s a real puzzle this one. It’s a ship everyone wants to love but seems to have had its wings clipped on deployment. Take the hull and engine of your choice, but prioritise anything that makes you hard to lock on to or charges quickly (for boost). This thing drifts fantastically so use that to turn on targets. Rotary cannon has high DPS and joint ion makes it good for poor defender pilots who choose to joust rather than drift against you but its very slow to charge. I’d personally go for standard (faster recharge) and resonant shield, as you’ll get passive laser overcharge once shields are maxed out and they have no decay. Taking the gyro doubles your other loadout so rockets for dogfight, proton bombs for fleet battles. Personally I wouldn’t take this to a fleet battle though and only use it for DF if you have a good team and equal or lesser skilled opponents. You want to love it but…
TIE Defender
A ship with rapid recharge across all systems, dampener hull and scrambler shield is a must. You cannot afford to take an ion hit in this ship because if you lose your shields, even a sneeze will see your cockpit pop. Engine of your choice, you weigh up the pros and cons. Lasers for me are either standard or burst, I’d go standard as again that rapid charge means you get them back pretty quick, although the higher DPS of burst is great for cap ship damage. Aux slots? Ion missile and either conc or anti Starfighter. There is an argument both for and against the APS which gives rapid charge of a system (or some power to all three if power is balanced). For fleet battles you might choose ion missile plus APS, using the ion missile for both shields and PvP, with APS to rebuild lasers while drifting round. This should give more cap ship damage than waiting for concs to reload. To master the defender you must master power management and drifting, don’t get caught flying straight and NEVER come to a stop.
Top tips for any ship
Never take a head on joust, especially if you are an interceptor or if up against something tanky like the tie bomber.
Never underestimate an opponent, Imperial ships have the power to turn, shunt everything to lasers and take you out with an overcharged shot very quickly.
Be wary of shooting something in a drift, it’s difficult to land shots as the aim assist seems to struggle with the ever changing acceleration and deceleration.
Always have boost available. If taking someone on then you boost at an angle, drift and shoot them while drifting, don’t just joust them head to head.
Pay attention to the field, listen to team coms. If someone is in trouble and you can peel off and help them, do it. You lose games by collectively dying, your objective is to keep your team alive. Much better to have lots of assists and low kills if you can keep your team mates alive.
Don’t get drawn in to a circling war. Gauge your opponents and work out who the weakest player is then take them out as a team. Getting drawn in to a fight where you can’t land shots means at some point, your opponent’s team mates are going to come and finish you off.
Know where the resupply points are in dogfights. Only take them if you need them, or if its yavin, to deny them to the enemy. In any case, voice coms should be used to say you intend to take one. If you just need a missile resupply and a team mate is on 10% hp, he needs it more than you. If you’ve been hit and are on 80% hull you will survive, denying it to a team mate who is on worse condition is just selfish. I really can’t emphasise how important it is to talk continuously throughout a game.
Game Types and Tips
Dogfights
Dogfights is a 5v5 engagement set in any of the SWS maps. There are usually 2 resupply points, however Esseles has 3 (two outside the station and one in the middle) and Sissubo has only one. The winner is the first team to reach 30 kills, so your priority is not to kill the other team, but to stay alive. If you’re taking damage, don’t hang in there hoping to finish off your target, get the hell out, find out who’s on your six and stay evasive until you can heal, break them off or get backup.
Target priority should be support ships first. Some players come in and spam turrets which are more of a nuisance than anything else. Shoot the turret with a quick burst then focus that support down. If you’re playing as empire, after the support you need to get rid of any Y-Wings running ICT turrets. Don’t take them head on and try to get underneath them and out of reach of the ICT. For both these ships, someone running an ion missile to dunk them for a disable and shield strip should lead the charge.
Ping your targets, make sure the team is focused on the right one. Doesn’t mean you have to have five on one so try to break in to wing pairs to whittle them down. Communication is key so everyone knows which targets are being focused and who might be getting lined up for an ion.
If there are any interceptors in the opposition then they can be quick and easy kills due to their fragility, but don’t get too cocky. An experienced pilot can drift and throw these about and be very difficult to hit. Always check the lineup when loading in and see who you are up against. You’ll soon start to recognise which players you can take out as a team, and which ones will tie you up making you vulnerable to their team mates.
Only joust in exceptional circumstances, by that I mean you have a loadout you know will win, have high hp and you’re going against a weaker ship. An A wing is not going to take down a Tie Bomber head on, nor will a TI take out a Y Wing or X Wing. With the right loadout, an A wing can beat a Tie Defender but why take the chance? Remember, your priority is survival. If you must go head on, boost at an angle to their side then drift in while firing. If in a Tie this is also a good time to shunt power to lasers for overcharge and max damage.
Learn the terrain and use it. Fostar haven has beams, sheet steel, tunnels and even a large trench while Essesles has its station. The only map where you don’t have cover is Yavin and even here you can dive for the clouds to disappear from radar. This will cause you damage though so don’t linger too long. If you know the map you can use it to throw off a pursuer, break a missile lock or become a shark that pounces on an unsuspecting enemy. If you are out in open space you can be seen and if you can be seen you can be shot. If you are in a fragile interceptor you don’t want to be caught out in the open, especially against a bomber with rotary cannon.
Team composition for rebel in my opinion should be one Y Wing, one A wing and 3 X Wings, but you can always sub the A Wing for another X or Y. Y Wings should run ICT and goliath, Xwings should have an ion missile then second slot of their choice. Boost extension or repair would be good choices depending on how well you can manage your power. A wings can run rapids or standards, stealth and repair or repair and a missile. Support ships really aren’t required for a dogfight, they can be used to good effect if running resupply and mark, but they can be vulnerable except in top tier hands where they become almost impossible to hit.
Imperials should have at least 1 Tie Bomber, 2 Tie Fighters and 2 defenders. You could run an interceptor in place of a defender or tie fighter as well. Defenders in particular are vulnerable to the ICT as it will strip your shields and leave that glass hull vulnerable. Ion missiles are invaluable for the fighters and defender, while Bomber needs jet engine and rotary for rapid shunting from the engines to cannon. It again can run the goliath and multilock missiles. Some might choose the assault shield, but its manoeuvring penalty just isn’t worth the trade off in my opinion. Like the rebels, supports aren’t necessary.
The ‘meta’ is always changing and can vary depending on team. Some like to use a lot of bombers, both for the TB’s tankiness or the Y wings ICT. 3 or 4 Ywings all running ICT is not a fun match. But they can be beaten with good comms. If the ICT is active, get the hell out, wait for it to finish then dive in and wreck it. Other teams like to run fighters with heavy hulls, shields and repair kit giving them high HP. Couple with burst lasers they take a lot of fire and give just as much out. If you are up against a lot of Tie Bombers, the A Wing can be a useful asset. It may be easy to kill, but if you run stealth, rapid fire and rockets you can do a lot of damage to a TB before going evasive.
Interceptors should never stay too long on a target, they rush in, cause damage and get out. Don’t stick around for the kill, just let your team mates know who is low and get out while they finish up. Your role is to circle the pack, staying evasive and looking to see who has their back to you. Run in, get them off your team mates back and make them panic.
Fleet battles
A lot of new players make the mistake of believing that fleet battles is a player vs player (pvp) engagement. It isn’t. It’s more player vs environment (pve) since your objective is to take out the enemies cap ships, not their players. The only reason to attack the enemy players is to earn morale and in defence of your own capital ships. You can earn morale though by ‘farming’ that is having one but preferably two people exclusively in bombers hunting ai using multilocks and goliath missiles to take down a whole pack at a time.
If you are not playing as a farmer, then your priority targets on the opening phase and when defending are enemy raider then incoming enemy torpedos/missiles. Most players will be very evasive and difficult to hit, so learn to shoot down anything they fire at your ship, or get in front of it and use chaff to neutralize it. If you go after a player and he retreats then you have done your job. Don’t chase him and get beamed down by the enemy cap ships because you strayed too far, get back on defence and chase the next enemy away.
Fleet battles has been described as the ‘premier’ game mode on SWS and is the one that competitive teams play as that is what tournaments are focused on right now. There are so many videos and guides on it that I won’t spend much more time discussing it. Just remember these points:
Your priority is causing damage on capital ships, not chasing enemy players.
You MUST reduce number of deaths, fly evasively, practice drifting to throw off cap ship turrets and know when to retreat and heal rather than stay on and bleed morale to the opposition.
Build different loadouts to suit various stages of the battle. Do you really need multiple people running ion aux’s when shields are down? What use are torpedos when running defence?
If your current loadout doesn’t have what you need, retreat to the hangar and swap ship. Sure it will take a few seconds but if it will flip the phase it’s worth the pay off.
Use YouTube videos and online guides to learn where cap ship systems and turrets are. Taking down the turrets on a frigate means you get to spend more time attacking it and take less damage. Useful if its low and taking it out just as you switch to defence will get you some morale points back. Running against the MC75 and don’t know where the shield gens are? What about getting lost while trying to find your hangar so you can get a new ship? It happens. Learn the ships main features and how to get to them.
Work as a team. Know who is in what ship, what their role is and when they can be used to good effect. An X Wing with an ion torpedo can beam the shields down on a raider in one pass, let your bombers know and they can help finish it off quickly with rotary and a well-placed goliath. It’s all about communication and working together.
Do NOT chase the kill, no matter how low they are. If you get too bogged down with finishing someone off and chasing them in circles, you’ll get drawn in to the range of their frigates or cap ship before you know it.
Keep an eye on that morale meter, if you are on defence and it’s close to a flip it might be quicker to help take out an ai or two than try to kill the opposition. If you are on attack and it looks like you’re going to lose the advantage is it really worth making another run in? Make good choices!
Straight lines are killers so like dogfights, use the terrain. Hide behind rocks, use the tunnels in Esseles station, anything that allows you to get past the enemy players and get weapons on target. If retreating for a resupply or repair these are just as useful to shake off anyone trying to finish you off.
Level 1 Flight Training
Where tasks are set, these are to be performed with difficulty setting at Veteran.
Basic flying
Press start move forward right? Ok..but…NEVER FLY STRAIGHT. At least not for more than a second or two, unless you are absolutely sure no one has a shot on you. If flying in towards an enemy check your radar. Take a zig zag pattern, fly a corkscrew, anything that makes you more unpredictable. It makes it more difficult to get a missile lock or for an enemy to get a long range pot shot.
Task 1 – Know your ship!
Learn the fundamentals of flying – yaw, pitch and roll. Fly a time race course in practice mode. Trainee is to complete a racecourse of their choice without dying.
Power management
Squadrons power management allows you to ‘overcharge’ a system by moving energy in to it, at the detriment of losing power in other systems. E.g. moving power to shields will recharge them quicker and also overcharge them, giving you slightly more hit points. At the same time, laser recharge rate will be much slower and with less energy in engines you will be slower and less manoeuvrable.

Power to lasers will charge them quicker and then overcharge them, which creates a little more damage per shot (DPS). At the same time, shield and engine power will be lower. Overcharged lasers have a brighter LED indicator
Power to engines makes you faster and then begins to build boost, which gives you a small speed increase when activated and is also required to drift. Boost built is shown by the yellow bars around the throttle indicator
The key to good performance is knowing how and when to move that energy to the required system. Note: Boost is always preferable to any other system. Having boost means you can escape out of a situation quickly PROVIDED YOU DON’T FLY STRAIGHT!
One important thing to note is you cannot recharge a system faster than you use it. In other words, if power is in lasers while you are shooting, you will drain the lasers before they have a chance to recharge (although it will decrease the rate of power decay). If boosting you will use that boost up faster than you recharge it. Therefore, if using a system, put the energy in to another one, i.e. if firing lasers power should be in engines and if boosting, power should be in lasers/shields.
Task 2 – Take down the corvette
In practice mode load in a corvette/raider. Practice power management to get close to and strike at the corvette. You should be managing engines, lasers and shields (depending on ship). Build boost then lasers, when attacking the corvette your energy should be in engines as you’ll be firing lasers. When boosting away after an attack run, build back lasers and/or shields, repeat this cycle until the corvette is destroyed. Task is complete when you can kill the corvette/raider and not be killed.
Boosting and Drifting
There is more than one type of boost and drift. You will hear of boost skipping, boost gasping, dead drifting, moon bounce etc. This is the basics. You should overcharge engines to build boost, shown by the yellow boost bar filling up around your throttle gauge. Once you have built up boost, press the boost key and when you reach max boost speed, press the drift key and hold it (this may be the same button for console users depending on how you have configured your buttons). While drifting you can turn, you should continue in the same direction for a short period, indicated by the ‘dust trails’ on screen. You can get a longer drift by moving power from engines to another system before performing your boost then drift. This is known as the dead drift.
A point to note, you should never boost continuously, that is press boost and use up all the energy in one go. It is more economical to boost skip, this is pressing boost, then drifting, pressing boost then drifting. E.g. if your max ‘normal’ speed is 150 and your max boost speed is 200, boost to 200 then drift, as your speed comes back to 150, boost then drift again. By doing this you will get more distance than just holding down boost.
Task 3 – Power Management
Trainee is to charge one other system while boosting and drifting.
How – Charge boost by putting power to engines, once charged you should move power to intended system (e.g. lasers), boost, drift then power back to engines.
Purpose of this is to build up charge in another system, while at the same time maintaining boost levels. Timing here is critical, power to lasers > boost > drift > power back to engines. Repeat until lasers or shield is over charged. Timing from drifting to putting energy back to engines is around half a second, this should recharge most if not all of the boost energy used when you started your drift.
Drifting is a great way to turn and face down an opponent, or get out from under fire. Turning at 50% is faster than turning at 100%. There’s also a slight flaw in the game data, which means boosting at 50% or even 0% throttle, actually gives faster acceleration than boosting from 100%. To take advantage of this, check your game settings and make sure that throttle movement to cancel boost is off.
Task 4 – AI dogfight
Trainee is to perform a custom dogfight as an A Wing against 1 squadron of Tie Fighters and 1 Squadron of Tie Interceptors. Goal is to win with minimal losses, using boosting, drifting and power management to stay in the fight as long as possible. Trainee MAY retreat to resupply point.
Reporting of task completion
If you can record yourself completing each of these tasks for evidence purposes it would be appreciated. You will operate on an honesty basis though, on completion of all tasks you should request an academy instructor/ Jedi Elite member to take you for a check flight.
Level 2 Flight Training
Targeting and ping
Online play is a TEAM game. In order to succeed the one thing you need is communication, ideally through voice coms. Naturally we’d like it to be on discord, in game chat if you can’t use discord. But for some people that’s not an option or maybe you are ‘solo’ queuing some public matches. In that case how do you let your team mates know your intentions?
One of the most powerful tools in SWS is the in game ‘ping’. Let’s start by looking through the options menu, you have options for target nearest, target enemy targeting you etc. You can decide if you want to target all enemies, the enemy squadron, ai, sub systems etc. It is VITAL you understand how to access these targeting functions quickly in order to make the most of them. Some people may have some of these hot keyed if they use them regularly. Personally, I have cycle targets, target my attacker and target in front hot keyed to my joystick hatswitch.
The second thing to learn is how to ‘ping’ a target, that means you target an ai, a player, a cap ship or subsystem, and then ‘ping’ it so that you are telling others on your team to attack it. Used in association with voice comms, this ping becomes INCREDIBLY powerful. It might be to let your Objective players find the raider quickly during a defensive phase, pointing out an incoming bomber to intercept him and shoot his torpedoes. It could be that you are under attack and need someone to help take him off you. Maybe it’s a dogfight and you want to focus a specific player.
When you ping someone and you are in voice chat say WHY. Dogfights – “this guy next” “he’s on me” in fleet battles “support here” “raider here” “I’m going to attack this frigate”. As well as highlighting your intended target it also lets your team mates ACCEPT your ping and make it THEIR target. This also means when your team mates ping someone you can accept THEIR target.
So, your next task is to look at the options menu and work out for your system and setup, how your targeting system is keyed and how to make it work for you. You also need to ensure you can quickly ping a target and know how to accept a ping.
One final communication point that is underused at lower levels but highly utilised on high tier game play is “regroup on me”. On PC I believe this is on a selection icon tied to key press number 6, however you should be able to assign this one function to a quick press. Great for telling people to get in close if playing support ready to mask them, or in general to get your team grouped back in one area.
Task 5 – Set Targeting
So, your next task is to look at the options menu and work out for your system and setup, how your targeting system is keyed and how to make it work for you. You also need to ensure you can quickly ping a target and know how to accept a ping.
Radar
See that little circle thing with the dots? Use it. Ever find yourself lost and not knowing how to get back to your frigates or cap ship on fleet battles? Use the radar, you’ll see icons to help you get back to the right place. Red dots? They’re enemies, if you can’t see someone check for red dots, in dogfight it’s a good way to tell if someone has spawned in behind you and could get the jump on you. Or perhaps someone has gone stealth, they’ll show up on radar in three seconds so you should already be evasive and looking to see if they’re circling back on you rather than running away.
Anything on the inner circle is in front, anything on the outer circle behind you.

Power Shunting
For unshielded Imperial craft, shunting is a game changer. You can move all power from engines to lasers or vice versa. So that applies to Tie Fighter, Bomber and Interceptor. The key here is to make sure you have one system overcharged as MUCH as possible, then shunt it over to the other. If your ship has one system with rapid power charge, that might be the one to go with. For example, in a dogfight loadout I often run a Tie Fighter with slam engine and burst lasers. The burst lasers not only give me higher DPS over standard lasers, but they charge quickly too. Slam engine means I get some small charge once lasers are overcharged. I can fully overcharge my lasers then shunt that power to engines to build boost quickly, while continuing to recharge my lasers. Just be careful you don’t drain your systems too much though or you can get power charge delay.
Lets take another example. In Tie Bomber the rotary is immensely powerful but slow to charge up. However, if you take the jet engine its rapid boost means you can charge engines, shunt over and rebuild boost while now having lasers overcharged. If you use good power management while boosting, you can build boost and maintain that overcharge.
The Tie Interceptor doesn’t have a great choice when it comes to a rapid charging system. Sure, you could choose the rapid fire canon, but its DPS is actually lower than standard lasers. Plasburst has high DPS but also has a HUGE skill ceiling, not something you want to gamble with if stats are important to you. So Interceptors may find they have to build energy in engines first, but again none of them are as quick as the Jet engine available to the TB or TF and you don’t have SLAM either. The Interceptor class is both fragile and requires a higher level of power management to make effective. But master it, and you can cause serious damage to the enemy team.
Task 6 – Power Shunting
Create a custom fleet battle vs ai. You are to fly ONLY as a Tie Bomber with Jet engine and rotary cannon, you may fly aux components of your choice. Your mission is to kill as many enemy ai ‘creep’ fighters and ai ‘player’ craft as possible, as well as complete the fleet battle. Try to keep your own deaths to a minimum. In order to cause maximum damage with rotary cannon you will need to overcharge it, either by using power management or by shunting engine boost power to it. You may also find times when you require extra boost to turn or escape a situation, so may need to shunt power from lasers to engines.
Post a final scoreboard screenshot to show completion.
Missile Dunking
What is missile dunking? It’s the art of firing an aux off at a speed and range that prevents it being chaffed.
When you fire torpedos and some missiles, you can give them an extra speed kick at launch by pressing boost just before launching. They will eventually slow down to their normal speed, but that initial kick really makes a difference. So point one, before launching you must boost.
Ok you’ve made that torp/missile faster by boosting before launch, but if you fire it from a distance it’s still going to slow back to normal speed and your target has a warning or can see it coming. So, you have to fire it as close as you can. For torpedo’s fire them at a cap ship at the 500m mark (You will lose lock at 500m but have a split second which means you can fire around 450 or so, practice holding fire till 500, hit boost then fire). For missiles you want to wait until you are within a max of 300, ideally closer to 200, boost then fire.
You’ll hear ion dunking phrased a lot. Ion missile – lock on target, gain range, boost at 300, fire around 250 or less. Opponent will rarely have time to chaff once he gets the incoming missile alert. Even if he does, ion splash damage could still disable him.
When missile dunking, you can do it head to head but if you leave it too late the ship may be drawing level as you fire, which means the missile has to do a u-turn to catch him. Often this ends up with the missile just circling around and being useless. Best approach is from behind, above or below. This also means you are in a better position to follow it up with some well-aimed shots to finish that disabled enemy. Always tell your team what you’re doing, this means they can help finish him off and also prevents two people firing at the same time. If he does chaff your missile a team mate is already in position to follow it up. Remember to ping target and say you’re going to dunk them and If he chaffs it report that too, team now knows someone has chaffed and is vulnerable to a lock for 9 seconds or so.
Torpedos, never fire from distance, get lock, close distance and boost at 500 before releasing. Make sure you know the lock time, you don’t want to be bee lining in a straight line for too long.
Task 7 – Torpedo Throwing
You can practice the torpedo run by launching a custom fleet battle (solo or vs ai). It must be a custom match, as this will fire up the game with the current server side tweaks to ships etc. Create as much damage as you can using only torpedos and lasers.
Post final screenshot.
Task 8 – Missile Dunking
You can also practice ion dunks in a custom fleet battle against ai and then when you feel ready, take it out to the real world in a public dogfight.
Post a final screenshot of your public dogfight score.
Note: If you are struggling to lock on to someone with a missile they may be running deflector hull/shield to slow your lock. In this case it may be quicker to turn your attention to a different target.
Creating Custom Games
This is for those people that have never created a custom game before, but will also throw in tasks for those ready to challenge themselves outside the practice arena.
SWS allows you to create your own modified version of a dogfight, fleet battle or fleet battle vs ai (which can be done as a co-op mission or solo). The custom match option is great for practicing, the last updates to the game were server side only which means the practice mode does not have the up to date versions of ships and components. By creating a custom match you can practice with the ships in their current state, and these games do not contribute to challenges or stats.
To begin, go to the multiplayer menu where you will see the options to create or join a custom match. During an event you may need to use Join custom match. If you select it you will see a list of current custom games being hosted. You can filter them by using the tabs at the bottom to select certain game modes or select between public and password protected matches. Use the filters to help you quickly join a password protected match during Week of war or other contests. You can also join a custom match as a player or spectator.
For now, lets click on create custom match. On the basic settings tab you can select the game type, map you wish to play, privacy level (i.e. public, private or invite only) and can set if the game has a password or not. The other options won’t make much difference to your game or its visibility.
Game settings always you to change things depending on game type. For dogfights you can set the points to win and how long the match lasts, fleet battles you can set match time and kick off time, vs AI you can decide which team you are on and the AI difficulty.
Restrictions menu is where the fun begins. Here you can start banning which ships players can use, this does not apply to AI players!! You can also ban auxiliary types and countermeasures. So you could use this to set an X Wing Vs Tie Fighter laser only match. Just saying!
Modifiers menu gives even more fun. You can alter how much damage you take from a collision, changing it from take barely anything all the way to instant death. You can set hull and shield changes for NR or Imperial, cool down times, damage multipliers for cap ships etc. There are so many options here so best thing is to just take a look and decide.
Finally, when you have set and played with the options and created a match you want, you have a choice of creating it as player or spectator. Great if for example you want to live stream a match as spectator I guess.
You can also save settings so that if you have a setup you like, you don’t have to keep recreating it. This is really useful for DJO cup or Week of War matches where settings are likely to remain set for as long as those events last.
Task 9A – Rebel Raider Race
Ok, next task is to create a custom match with the following settings:
Fleet battle
Collision damage to 5.0
New Republic hull set to 0.5
Respawn time 18 seconds
Imperial Flagship hull/shields to 0.1
Imperial cap ship hull/shields to 0.1
You are to play as Rebel, with the goal being to finish the game as quickly as possible. You’ll note the raider is the only capital ship with normal hull settings. From what you have learned in the previous tasks this shouldn’t present much of a problem now. Once the raider is down, race to finish off the other ships as quickly as possible, you WILL need to get some ai creep fighters once the raider has gone down in order to get morale up to flip for the attack.
Post final scoreboard screenshot (no video required)
Task 9B – Imperial Corvette Race
repeat with settings reversed so you are playing as Imperial
Task 10A – Rebel Frigate Run
Create a custom fleet battle, set:
New Republic hull to 0.5
Imperial raider hull/shields 0.1
Imperial flagship hull/shields 0.1
Similar to the previous task, this time you are to take out the frigates as quickly as possible, then finish the game.
Post final scoreboard screenshot (no video required)
Task 10B – Imperial Frigate Run
repeat with settings reversed so you are playing as imperial
Task 11A – Rebel Star Destroyer Run
Create a custom fleet battle, set:
New Republic hull to 0.5
Imperial raider hull/shields to 0.1
Imperial cap ship hull/shields to 0.1
The behemoth, now the Star Destroyer is the only one with max hull. You know what to do!
Final scoreboard screenshot to be posted (no video required)
Task 11B – Imperial MC75 Run
repeat with settings reversed so you are playing as imperial.
Final Flight
On completion of all tasks you are to challenge an academy instructor/ Jedi Elite member to a 1v1 dogfight.
Final Test Rules
Custom dogfight 1 v 1.
Ten minutes, 30 kills.
Academy Instructor / Jedi Elite member may request a spectator to monitor the trainee for power management etc.
Aim of check flight is not to be the victor, but to limit the number of deaths. You are of course expected to try and kill the instructor if possible, but should also use evasion and power management to limit your own deaths.